When you step into the world of music production, one of the first things you’ll encounter is the concept of studio monitors. These specialized speakers are designed to provide a flat frequency response, which means they reproduce sound as accurately as possible without coloring it. Unlike regular speakers that may enhance certain frequencies to make music sound more appealing, studio monitors aim for precision.
This accuracy is crucial for producers and sound engineers who need to hear every detail in their recordings, from the subtle nuances of a vocal track to the thumping bass of a kick drum. Studio monitors come in various shapes and sizes, but they all share the common goal of delivering an unembellished sound. You might find them in professional recording studios, home studios, or even in the setups of passionate hobbyists.
The design of these monitors often includes features like a larger woofer for low frequencies and a tweeter for high frequencies, allowing them to cover a wide range of sounds. Understanding what studio monitors are and how they function is the first step in elevating your audio production skills.
Key Takeaways
- Studio monitors are specialized speakers designed for accurate audio reproduction in recording and mixing environments.
- Studio monitors are essential for achieving accurate and balanced sound during the recording and mixing process.
- There are two main types of studio monitors: active (powered) and passive (unpowered), each with its own set of advantages and considerations.
- When choosing studio monitors, key features to look for include frequency response, power rating, connectivity options, and built-in acoustic controls.
- Setting up studio monitors for optimal performance involves proper placement, angle, and distance from the listening position, as well as considering room acoustics and reflections.
Why Studio Monitors Are Essential for Recording and Mixing
The importance of studio monitors cannot be overstated when it comes to recording and mixing music. As you dive into the creative process, having a reliable pair of monitors allows you to make informed decisions about your sound. When mixing, you need to ensure that each element of your track sits well within the overall mix.
Studio monitors provide the clarity and detail necessary to achieve this balance, enabling you to hear how different instruments interact with one another. Moreover, studio monitors help you identify issues that may not be apparent when using standard speakers or headphones. For instance, you might notice that certain frequencies are overpowering or that a vocal track is buried in the mix.
With studio monitors, you can make adjustments with confidence, knowing that what you hear is a true representation of your work. This level of accuracy is essential for producing high-quality music that translates well across various playback systems, from car stereos to earbuds.
When selecting studio monitors, you’ll encounter two primary types: active and passive. Active studio monitors come with built-in amplifiers, which means they are ready to use right out of the box. This convenience is particularly appealing for those who may not have extensive knowledge about audio equipment or who want to minimize the number of components in their setup.
With active monitors, you can simply connect them to your audio interface or mixer and start producing music. On the other hand, passive studio monitors require an external amplifier to function. While this may seem like an added complication, many audio professionals prefer passive monitors for their flexibility and potential for higher-quality sound reproduction.
By choosing your amplifier separately, you can tailor your setup to meet your specific needs and preferences. However, this option may not be ideal for beginners who are just starting their audio journey and may benefit from the simplicity of active monitors.
Key Features to Look for When Choosing Studio Monitors
When you’re in the market for studio monitors, several key features should guide your decision-making process. First and foremost, consider the size of the monitor’s woofer. Larger woofers typically produce deeper bass frequencies, which can be beneficial for genres that rely heavily on low-end sounds.
However, if you’re working in a smaller space, a monitor with a smaller woofer may be more appropriate to avoid overwhelming your room with bass. Another important feature to look for is the frequency response range. A wider frequency response means that the monitor can reproduce both low and high frequencies more accurately.
Ideally, you want a monitor that can cover at least 40 Hz to 20 kHz, as this range encompasses most of the sounds you’ll encounter in music production. Additionally, consider the monitor’s power output; higher wattage generally means louder volumes without distortion, which can be crucial during mixing sessions.
How to Set Up Studio Monitors for Optimal Performance
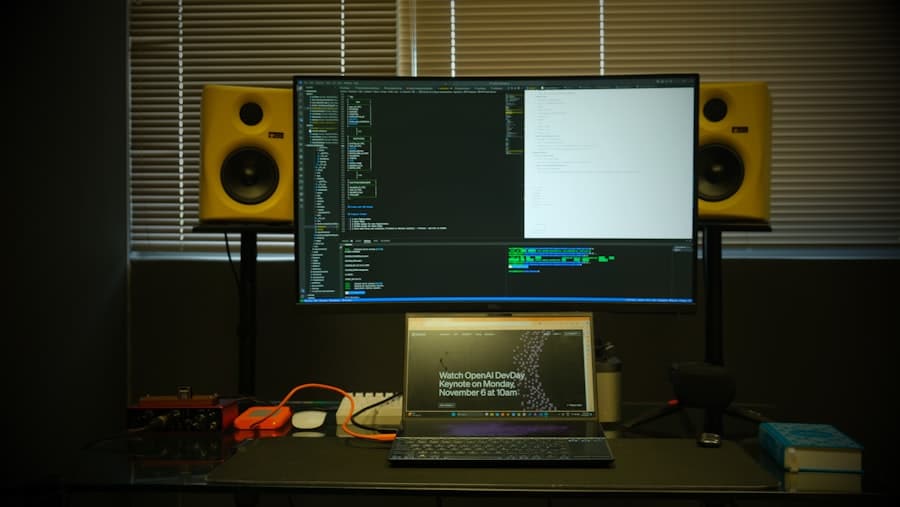
Setting up your studio monitors correctly is essential for achieving optimal performance. The placement of your monitors can significantly impact how you perceive sound in your space. Ideally, you should position them at ear level and form an equilateral triangle with your listening position.
This arrangement allows you to experience a balanced stereo image and ensures that you’re hearing the full spectrum of sound accurately. It’s also important to consider the distance between your monitors and the walls. Placing them too close to a wall can result in bass buildup, leading to an inaccurate representation of low frequencies.
Aim for at least a few feet of space between your monitors and any walls or corners. If you’re working in a smaller room, consider using acoustic treatment materials like bass traps or foam panels to help mitigate any unwanted reflections or resonances.
The Importance of Acoustic Treatment in Studio Monitor Placement
Acoustic treatment plays a vital role in how effectively your studio monitors perform. Even the best monitors can sound subpar if they’re placed in an untreated room with poor acoustics. Sound waves bounce off hard surfaces like walls and floors, creating reflections that can muddy your mix and make it difficult to hear details accurately.
By investing in acoustic treatment, you can create a more controlled listening environment that enhances your monitoring experience. Common acoustic treatment options include foam panels, bass traps, and diffusers. Foam panels help absorb high-frequency reflections, while bass traps are designed to manage low-frequency buildup in corners.
Diffusers scatter sound waves evenly throughout the room, preventing harsh reflections that can distort your perception of sound. By strategically placing these treatments around your studio, you’ll create a more balanced acoustic environment that allows your studio monitors to shine.
Tips for Calibrating Studio Monitors for Accurate Sound Reproduction
Calibrating your studio monitors is an essential step in ensuring accurate sound reproduction. One effective method is to use a measurement microphone and software designed for room analysis. This setup allows you to analyze how sound behaves in your space and identify any problematic frequencies that may need adjustment.
By taking measurements at various points in your room, you can gain insights into how to optimize your monitor placement and acoustic treatment. Additionally, many modern studio monitors come equipped with built-in EQ settings that allow you to tailor their response based on your room’s characteristics. Experimenting with these settings can help you achieve a more balanced sound that translates well across different playback systems.
Remember that calibration is not a one-time task; as you make changes to your setup or room layout, it’s essential to revisit this process periodically.
Common Mistakes to Avoid When Using Studio Monitors
As you embark on your journey with studio monitors, there are several common mistakes you’ll want to avoid. One frequent error is neglecting proper placement; many people simply set their monitors on their desks without considering optimal positioning. Remember that ear level placement and adequate distance from walls are crucial for accurate sound reproduction.
Another mistake is relying solely on headphones for critical listening tasks like mixing and mastering. While headphones can provide valuable insights into certain aspects of your mix, they often lack the spatial representation that studio monitors offer. It’s essential to use both tools in tandem to achieve the best results in your productions.
How to Extend the Lifespan of Your Studio Monitors
Taking care of your studio monitors is key to extending their lifespan and maintaining their performance over time. One simple yet effective practice is to keep them clean and dust-free; dust accumulation can affect sound quality and even damage components over time. Use a soft cloth or microfiber towel to gently wipe down the surfaces regularly.
Additionally, be mindful of how you handle your monitors during setup or transport. Avoid dropping or jostling them, as this can lead to internal damage that may not be immediately apparent. If you’re using active monitors, ensure that they are powered off before connecting or disconnecting cables to prevent any electrical surges from damaging the internal components.
Upgrading Your Studio Monitors: When and How to Do It
As you grow as a producer or engineer, there may come a time when you feel it’s necessary to upgrade your studio monitors. Signs that it might be time for an upgrade include feeling limited by your current monitors’ frequency response or noticing that you’re consistently struggling with mixes translating well across different playback systems. If you’ve invested time in acoustic treatment and calibration but still find yourself dissatisfied with your monitoring experience, it may be worth exploring new options.
When considering an upgrade, take the time to research different brands and models that fit within your budget and meet your specific needs. Listen to various monitors in person if possible; many music stores have demo setups where you can test different models side by side. Pay attention not only to how they sound but also how they feel in terms of build quality and user experience.
Top Studio Monitor Brands and Models to Consider
As you navigate the world of studio monitors, several brands stand out for their quality and reputation among audio professionals. Yamaha’s HS series is renowned for its accurate sound reproduction and has become a staple in many studios worldwide. The KRK Rokit series is another popular choice, known for its punchy low end and vibrant design—ideal for electronic music producers.
If you’re looking for high-end options, consider brands like Genelec or Focal, which offer exceptional clarity and detail but come at a higher price point. For those on a budget, brands like JBL and Mackie provide solid performance without breaking the bank. Ultimately, the best choice will depend on your specific needs and preferences as an audio creator.
In conclusion, understanding studio monitors is crucial for anyone serious about music production or audio engineering. By recognizing their importance, knowing how to set them up properly, and avoiding common pitfalls, you’ll be well on your way to creating high-quality mixes that resonate with listeners across various platforms.
If you are looking to enhance your home studio setup with high-quality sound, you may want to consider investing in studio monitors. These speakers are designed to provide accurate and detailed audio playback, making them essential for mixing and mastering music. For a more in-depth look at the benefits of studio monitors, check out this article on studio monitors from Ultimate Discount.
FAQs
What are studio monitors?
Studio monitors are speakers specifically designed for use in recording studios, to provide accurate and uncolored sound reproduction. They are used by audio engineers and producers to mix and master music and other audio recordings.
How do studio monitors differ from regular speakers?
Studio monitors are designed to provide a flat frequency response, meaning they reproduce sound without adding any coloration or enhancement. This allows audio professionals to hear the true characteristics of the audio being produced. Regular speakers, on the other hand, are often designed to enhance the sound for a more enjoyable listening experience.
What are the different types of studio monitors?
There are two main types of studio monitors: active (powered) and passive (unpowered). Active studio monitors have built-in amplifiers, while passive studio monitors require an external amplifier. Active monitors are more common in professional studio settings due to their convenience and built-in optimization.
What factors should be considered when choosing studio monitors?
When choosing studio monitors, factors to consider include frequency response, power handling, size of the room, and the intended use (mixing, mastering, or general listening). It’s important to choose studio monitors that accurately reproduce sound and are suitable for the specific studio environment.
Why are studio monitors important for audio production?
Studio monitors are crucial for audio production because they provide an accurate representation of the sound being produced. This allows audio professionals to make informed decisions when mixing and mastering music and other audio recordings. Using studio monitors ensures that the final product will sound as intended across different playback systems.