As you embark on your journey into the world of camper solar panel systems, understanding the wiring diagram is crucial. A camper solar panel wiring diagram serves as a visual guide that illustrates how various components of the solar system connect and interact with each other. This diagram not only simplifies the installation process but also helps you troubleshoot any issues that may arise in the future.
By familiarizing yourself with this essential tool, you can ensure that your solar setup operates efficiently and effectively, providing you with the power you need while on the road. In an age where sustainability and energy independence are becoming increasingly important, equipping your camper with solar panels is a smart choice. Not only does it allow you to harness the sun’s energy, but it also reduces your reliance on traditional power sources.
As you delve deeper into the intricacies of camper solar panel systems, you’ll discover that understanding the wiring diagram is just the beginning. The knowledge you gain will empower you to make informed decisions about your energy needs, ultimately enhancing your camping experience.
Key Takeaways
- Understanding the components of a camper solar panel system is crucial for successful installation and operation.
- Choosing the right solar panels for your camper involves considering factors such as size, efficiency, and durability.
- Proper wiring and connecting of solar panels to your camper’s electrical system is essential for optimal performance and safety.
- Regular maintenance and troubleshooting are important for ensuring the longevity and efficiency of your camper solar panel system.
- The benefits of using solar panels in a camper include cost savings, environmental friendliness, and increased energy independence.
Understanding the Components of a Camper Solar Panel System
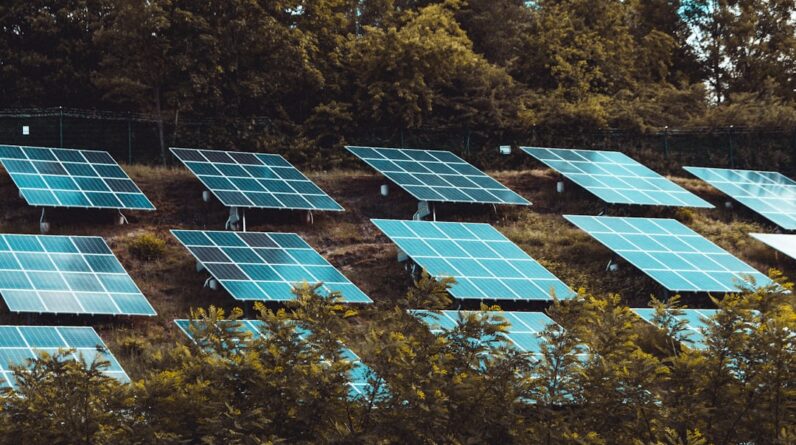
To fully grasp how a camper solar panel system works, it’s essential to familiarize yourself with its key components. At the heart of the system are the solar panels themselves, which capture sunlight and convert it into electricity. These panels are typically made up of photovoltaic cells that generate direct current (DC) electricity when exposed to sunlight.
Understanding the specifications and capabilities of your chosen solar panels will help you determine how much power you can generate and store. In addition to solar panels, a complete camper solar panel system includes a charge controller, batteries, and an inverter. The charge controller regulates the voltage and current coming from the solar panels to prevent overcharging the batteries.
This component is vital for maintaining battery health and ensuring longevity. The batteries store the energy generated by the solar panels, allowing you to use it when needed, even when the sun isn’t shining. Lastly, an inverter converts the stored DC electricity into alternating current (AC), which is what most appliances in your camper require.
By understanding these components and their functions, you can better appreciate how they work together to create a reliable power source for your adventures.
Steps for Installing a Camper Solar Panel System
Installing a camper solar panel system may seem daunting at first, but breaking it down into manageable steps can simplify the process significantly. The first step involves assessing your energy needs. Consider what appliances and devices you plan to use while camping and calculate their total wattage requirements.
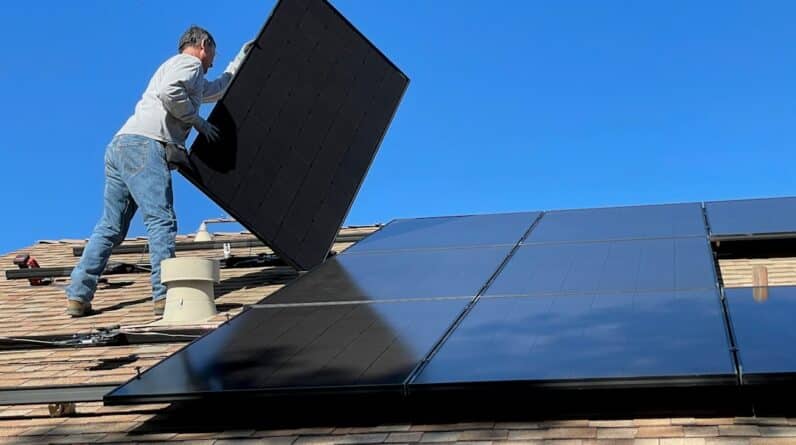
This will help you determine how many solar panels and batteries you’ll need to meet your energy demands. Once you’ve established your energy requirements, it’s time to select a suitable location for your solar panels. Ideally, this should be a spot on your camper’s roof that receives maximum sunlight exposure throughout the day.
After securing the panels in place, you’ll need to connect them to the charge controller using appropriate wiring. Ensure that all connections are tight and secure to prevent any loss of power. Following this, connect the charge controller to your batteries, making sure to observe proper polarity to avoid damaging any components.
Finally, if you’re using an inverter, connect it to the batteries as well, completing your installation.
Choosing the Right Solar Panels for Your Camper
When it comes to selecting solar panels for your camper, several factors come into play. First and foremost, consider the type of solar panel technology that best suits your needs. Monocrystalline panels are known for their high efficiency and space-saving design, making them an excellent choice for campers with limited roof space.
On the other hand, polycrystalline panels are generally more affordable but may require more space due to their lower efficiency. Another important consideration is the wattage of the solar panels. Higher wattage panels can generate more electricity in a shorter amount of time, which can be beneficial if you’re often on the move or have higher energy demands.
Additionally, pay attention to the durability and weather resistance of the panels; they should be able to withstand various environmental conditions while maintaining optimal performance. By carefully evaluating these factors, you can choose solar panels that align with your camping lifestyle and energy needs.
Wiring and Connecting Solar Panels to Your Camper’s Electrical System
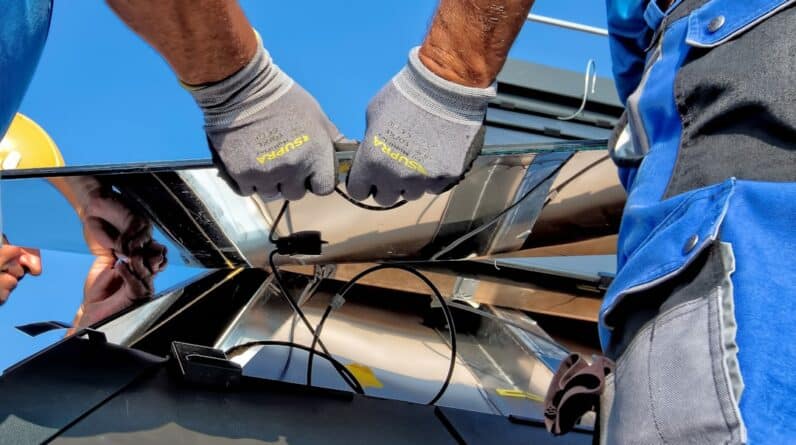
Wiring and connecting your solar panels to your camper’s electrical system is a critical step in ensuring everything functions smoothly. Begin by laying out all necessary components and tools before starting the wiring process. This includes your solar panels, charge controller, batteries, inverter, and appropriate wiring materials such as connectors and fuses.
Start by connecting the solar panels in series or parallel, depending on your system design and voltage requirements. If you’re connecting multiple panels in series, ensure that they are of the same type and wattage to maintain balance in voltage output. Once connected, run wires from the solar panels to the charge controller, ensuring that you follow proper polarity—positive to positive and negative to negative—to avoid any electrical mishaps.
After connecting the charge controller to the batteries, double-check all connections for security and accuracy before proceeding to connect the inverter if applicable. This meticulous approach will help ensure that your camper’s electrical system operates efficiently and safely.
Maintenance and Troubleshooting Tips for Camper Solar Panel Systems
Maintaining your camper solar panel system is essential for ensuring its longevity and optimal performance. Regularly inspect your solar panels for dirt or debris that may obstruct sunlight absorption. Cleaning them with a soft cloth or sponge can help maintain their efficiency.
Additionally, check all wiring connections periodically for signs of wear or corrosion; loose or damaged connections can lead to power loss or system failure. In case you encounter issues with your solar panel system, troubleshooting can often resolve common problems. If you’re not generating enough power, first check if there are any obstructions blocking sunlight from reaching your panels.
If everything appears clear but you’re still experiencing low output, inspect your charge controller settings and battery health. A malfunctioning charge controller or degraded batteries can significantly impact performance. By staying proactive with maintenance and being prepared to troubleshoot issues as they arise, you can enjoy a reliable power source throughout your camping adventures.
Benefits of Using Solar Panels in a Camper
The advantages of incorporating solar panels into your camper are numerous and compelling. One of the most significant benefits is energy independence; with a solar setup, you can generate your own electricity without relying on external power sources or generators. This not only enhances your camping experience by allowing you to camp in remote locations but also reduces noise pollution associated with traditional generators.
Moreover, using solar panels is an environmentally friendly choice that aligns with sustainable living practices. By harnessing renewable energy from the sun, you contribute to reducing carbon emissions and minimizing your ecological footprint while enjoying nature’s beauty. Additionally, investing in a solar panel system can lead to long-term cost savings on energy bills and fuel expenses associated with running generators or relying on campground hookups.
Overall, embracing solar energy in your camper opens up a world of possibilities for adventure while promoting a greener lifestyle.
Conclusion and Final Considerations for Camper Solar Panel Wiring Diagram
In conclusion, understanding camper solar panel wiring diagrams is an essential step toward creating an efficient and reliable power system for your adventures on the road. By familiarizing yourself with the components of a solar panel system and following proper installation procedures, you can ensure that your setup meets your energy needs while providing peace of mind during your travels. As you consider making this investment in renewable energy, take time to research different types of solar panels and assess their compatibility with your camper’s electrical system.
Remember that regular maintenance and troubleshooting are key to keeping your system running smoothly over time. Ultimately, embracing solar energy not only enhances your camping experience but also contributes positively to our planet’s future. With careful planning and execution, you’ll be well on your way to enjoying countless adventures powered by clean energy.
If you are looking to enhance your outdoor adventures with solar power, you may also be interested in a comprehensive review of the Hiseeu Wireless Security Camera System. This article provides valuable insights into the features and performance of this system, helping you make an informed decision for your security needs. Additionally, if you are interested in creating a complete home gym setup, you can check out the Signature Fitness Multifunctional Home Gym System review for a detailed analysis of its capabilities. And for those looking to keep their beverages cool on the go, the 20L Mini Fridge review offers insights into a compact and portable cooling solution.
FAQs
What is a camper solar panel wiring diagram?
A camper solar panel wiring diagram is a visual representation of the electrical connections and components involved in setting up a solar panel system in a camper. It shows how the solar panels, charge controller, battery bank, and inverter are connected to each other.
Why is a camper solar panel wiring diagram important?
A camper solar panel wiring diagram is important because it provides a clear and organized guide for installing and troubleshooting the solar panel system. It helps ensure that the components are connected correctly and safely, and can be used as a reference for maintenance and repairs.
What information does a camper solar panel wiring diagram include?
A camper solar panel wiring diagram typically includes the layout of the solar panels, the wiring connections between the panels, charge controller, battery bank, and inverter, as well as the specifications of the components used, such as wire gauges, fuses, and disconnects.
Where can I find a camper solar panel wiring diagram?
Camper solar panel wiring diagrams can be found in the installation manual provided by the solar panel manufacturer, the charge controller manufacturer, or the inverter manufacturer. They can also be found in online resources, forums, and DIY camper conversion websites.
Can I customize a camper solar panel wiring diagram for my specific setup?
Yes, a camper solar panel wiring diagram can be customized for a specific setup by adjusting the number of solar panels, the type and capacity of the battery bank, and the size of the inverter. It is important to ensure that the customized diagram meets the electrical requirements and safety standards.