When you embark on the journey of installing solar panels for your camper, understanding the wiring is crucial. Solar panel wiring involves connecting various components to ensure that energy generated from sunlight is efficiently harnessed and stored. At its core, the wiring system consists of solar panels, a charge controller, a battery bank, and an inverter.
Each component plays a vital role in the overall functionality of your solar setup, and knowing how they interconnect will empower you to make informed decisions. The wiring process begins with the solar panels themselves. These panels convert sunlight into direct current (DC) electricity.
The amount of electricity generated depends on factors such as the size of the panels, their efficiency, and the amount of sunlight they receive. Once the electricity is generated, it needs to be directed to a charge controller, which regulates the voltage and current coming from the solar panels to prevent overcharging the batteries. Understanding this flow of energy is essential for ensuring that your camper’s electrical system operates smoothly and efficiently.
Key Takeaways
- Understanding the basics of solar panel wiring is essential for a successful camper solar panel system installation.
- When choosing solar panels for your camper, consider factors such as size, efficiency, and durability to ensure they meet your energy needs.
- Careful planning of the layout of your solar panel system is crucial for maximizing energy production and optimizing space on your camper.
- Properly connecting solar panels to a charge controller is important for regulating the flow of electricity and protecting the battery bank.
- Wiring solar panels to the battery bank requires attention to detail and the use of appropriate cables and connectors to ensure efficient energy transfer.
- Installing an inverter and AC wiring for your camper solar panel system allows you to convert DC power from the battery bank to AC power for your appliances.
- Proper grounding and safety measures are essential for protecting your camper solar panel system from electrical hazards and ensuring its longevity.
- Being aware of and knowing how to troubleshoot common solar panel wiring issues can help you maintain and optimize the performance of your camper solar panel system.
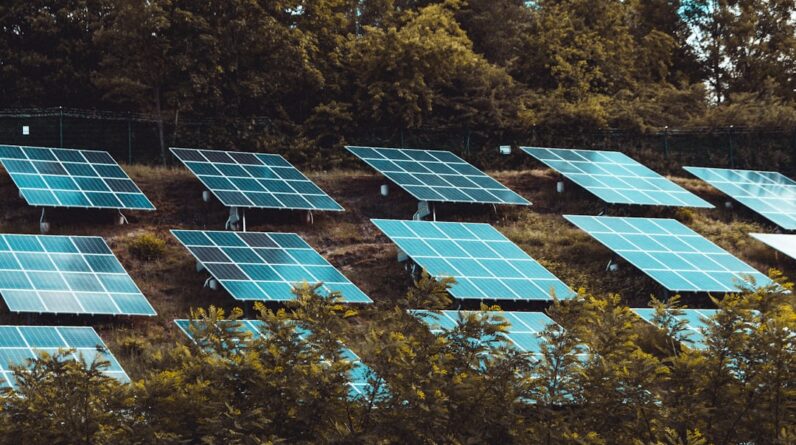
Choosing the Right Solar Panels for Your Camper
Selecting the right solar panels for your camper is a critical step in setting up your solar power system. You need to consider several factors, including your energy needs, available space on your camper’s roof, and budget. There are various types of solar panels available, such as monocrystalline, polycrystalline, and thin-film panels.
Monocrystalline panels are known for their high efficiency and compact size, making them ideal for limited roof space. On the other hand, polycrystalline panels are generally more affordable but may require more space due to their lower efficiency. In addition to panel type, you should also assess your energy consumption patterns.
Calculate how much power you typically use in a day by considering appliances like lights, refrigerators, and charging devices. This will help you determine how many solar panels you need to install to meet your energy demands. It’s also wise to factor in potential future needs; if you plan to add more appliances or devices later on, consider investing in additional capacity now to avoid future upgrades.
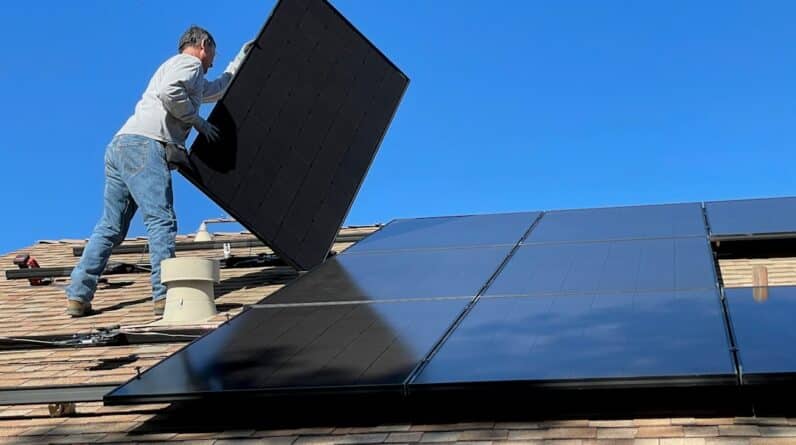
Planning the Layout of Your Solar Panel System
Once you’ve chosen the right solar panels, it’s time to plan the layout of your solar panel system. The layout involves determining where to place the solar panels on your camper’s roof for optimal sunlight exposure. Ideally, you want to position them in a way that minimizes shading from vents, air conditioning units, or other obstructions.
A clear and unobstructed view of the sun will maximize energy production throughout the day. In addition to physical placement, consider how the wiring will run from the solar panels to the charge controller and battery bank. You want to ensure that the wiring is as short as possible to reduce energy loss due to resistance.
Planning your layout carefully will not only enhance efficiency but also make installation easier. Take measurements and create a diagram of your setup; this will serve as a valuable reference during installation and help you visualize how everything will come together.
Connecting Solar Panels to a Charge Controller
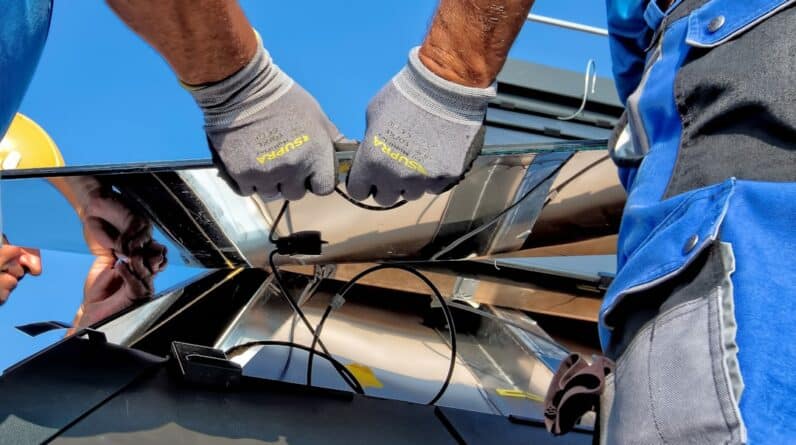
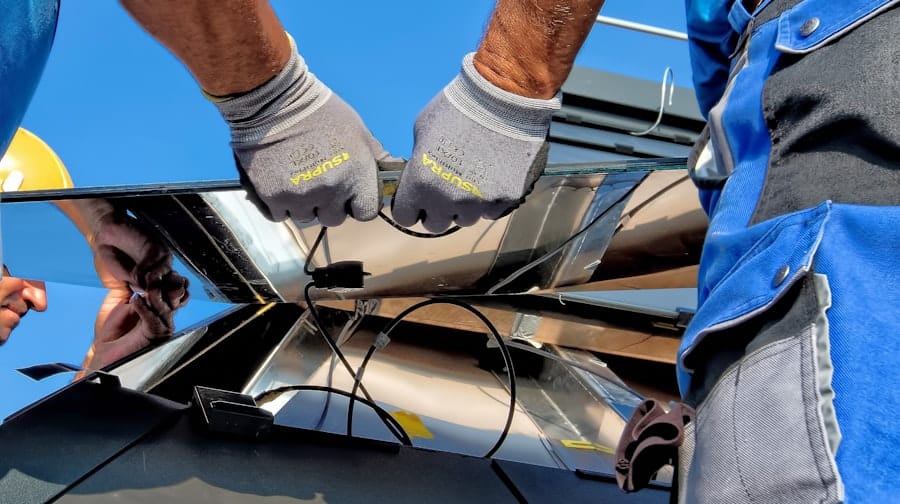
Connecting your solar panels to a charge controller is a pivotal step in your solar installation process. The charge controller acts as a gatekeeper for the electricity generated by your solar panels, ensuring that it flows safely into your battery bank without causing damage. To connect the panels, you’ll typically use MC4 connectors or similar types of connectors that provide a secure and weatherproof connection.
Before making any connections, it’s essential to turn off all components of your solar system to prevent any electrical hazards. Start by connecting the positive lead from the solar panel to the positive terminal on the charge controller and do the same for the negative lead. Once connected, you can turn on the system and monitor the charge controller’s display for any error messages or warnings.
A well-functioning charge controller will indicate that it is receiving power from the solar panels and managing it effectively.
Wiring Solar Panels to the Battery Bank
After successfully connecting your solar panels to the charge controller, the next step is wiring them to your battery bank. The battery bank stores the energy generated by your solar panels for use when sunlight is not available. When wiring your battery bank, it’s crucial to choose batteries that are compatible with your system—typically deep-cycle batteries designed for solar applications.
To wire the batteries, start by connecting them in parallel or series, depending on your voltage requirements. If you’re using multiple batteries, connecting them in parallel will maintain the same voltage while increasing capacity. Conversely, connecting them in series will increase voltage while keeping capacity constant.
Once you’ve configured your battery bank correctly, connect it to the charge controller using appropriate gauge wire to handle the current safely. Ensure all connections are tight and secure to prevent any potential issues down the line.
Inverter and AC Wiring for Your Camper Solar Panel System
An inverter is an essential component of your camper’s solar panel system if you plan to use AC appliances. The inverter converts DC electricity stored in your battery bank into AC electricity that can power standard household devices. When selecting an inverter, consider its wattage rating; it should be able to handle the total wattage of all devices you intend to run simultaneously.
To wire the inverter into your system, start by connecting it directly to your battery bank using heavy-gauge wire that can handle high currents safely. Ensure that you follow the manufacturer’s instructions for installation and pay attention to polarity—connecting wires incorrectly can damage both the inverter and your batteries. Once wired correctly, you can plug in your AC appliances directly into the inverter’s outlets or wire it into your camper’s electrical system for a more permanent solution.
Proper Grounding and Safety Measures
Safety should always be a top priority when working with electrical systems, especially when installing solar panels on your camper. Proper grounding is essential for protecting both you and your equipment from electrical faults or surges. Grounding involves connecting certain components of your solar system—such as the charge controller and inverter—to a common ground point that is connected to the earth.
To ground your system effectively, use a grounding rod driven into the ground near your camper or utilize existing grounding points if available. Connect all grounding wires securely and ensure they are free from corrosion or damage. Additionally, consider installing fuses or circuit breakers in line with your wiring to protect against overloads or short circuits.
These safety measures will help ensure that your solar panel system operates reliably while minimizing risks.
Troubleshooting Common Solar Panel Wiring Issues
Even with careful planning and installation, you may encounter issues with your solar panel wiring from time to time. One common problem is insufficient power generation, which can stem from various factors such as shading on the panels or loose connections in the wiring. If you notice that your batteries are not charging as expected, start by checking all connections for tightness and integrity.
Another issue could be related to the charge controller not functioning correctly. If it displays error messages or fails to show any input from the solar panels, consult its manual for troubleshooting steps specific to that model. Sometimes resetting or reprogramming the charge controller can resolve these issues.
Regular maintenance checks on all components of your solar system can help identify potential problems before they escalate into more significant issues. By understanding these aspects of solar panel wiring and installation for your camper, you can create an efficient and reliable solar power system tailored to your needs. With careful planning and attention to detail, you’ll be well on your way to enjoying sustainable energy while exploring the great outdoors.
If you’re interested in learning more about solar power and its applications, you may want to check out the article on GPS Theory and Applications Volume II. This article delves into the various uses of GPS technology and how it can be integrated with solar panels for more efficient energy production. To read more about it, click here.
FAQs
What is camper solar panel wiring?
Camper solar panel wiring refers to the electrical system that connects solar panels to the battery bank and other components in a camper van or RV. This wiring allows the solar panels to generate electricity from sunlight and charge the camper’s batteries.
Why is camper solar panel wiring important?
Camper solar panel wiring is important because it allows the solar panels to harness the sun’s energy and convert it into electricity to power the appliances and devices in the camper. It provides a sustainable and eco-friendly power source for off-grid camping.
What components are involved in camper solar panel wiring?
The main components involved in camper solar panel wiring include solar panels, charge controller, battery bank, inverter, and various wiring and connectors. These components work together to capture, store, and distribute solar energy for use in the camper.
How do you wire solar panels to a camper?
To wire solar panels to a camper, you will need to connect the solar panels to a charge controller using appropriate wiring and connectors. The charge controller is then connected to the battery bank, and the inverter is connected to the battery bank to power the camper’s electrical system.
What are the benefits of camper solar panel wiring?
The benefits of camper solar panel wiring include reduced reliance on traditional power sources, cost savings on electricity, environmental sustainability, and the ability to camp off-grid without sacrificing modern conveniences. Solar power is also quiet and low-maintenance, making it an attractive option for campers.